
 86 158 01078718
 86 551 65628861
Views: 0 Author: Site Editor Publish Time: 2026-09-15 Origin: Site


The automotive aftermarket heavily relies on fiberglass for custom aerodynamics and replacement parts. The disparity in fitment quality between manufacturers remains a well-known industry pain point. Buyers frequently purchase a fiberglass front bumper expecting a direct, bolt-on replacement. Instead, they face extensive bodywork due to warped molds, improper curing, or aggressive shrinkage. Understanding the exact technical process of how a bumper is molded is essential. You must evaluate manufacturer quality and mitigate installation risks. We will explore the journey from the initial plug to the final gel coat. This knowledge helps you assess the true labor requirements of an FRP bumper body kit and ensures a successful installation project.
Dimensional Accuracy Originates at the Plug: A high-quality mold requires an original master (often an OEM fiberglass bumper, a pristine factory steel bumper, or a precision 3D-milled buck) with meticulously tapered openings and exact radii to prevent structural stress.
Curing Protocols Dictate Fitment: Premature demolding accelerates production but guarantees fiberglass shrinkage and warping, destroying the bumper's alignment with factory fender lines.
"Bolt-On" is a Misnomer: Due to the rigid nature of fiberglass and variances in aging vehicle chassis, achieving a perfect fit always requires localized sanding, shaving, or material build-up.
Cheaper initial purchase prices for fiberglass bumpers typically result in exponentially higher body shop labor costs to correct manufacturing defects.
Dimensional accuracy begins long before the first layer of resin hits the mold. Manufacturers must create a master plug. They often use an OEM fiberglass bumper or a CNC-machined buck as the baseline. Original factory bumpers serve as direct plugs when prepared correctly. Technicians coat them heavily with specialized mold release agents. Polyvinyl alcohol (PVA) or heavy paste waxes prevent the tooling resin from bonding to the master. Modern facilities frequently 3D scan the vehicle chassis. They use this data to mill a high-density polyurethane foam buck on a 5-axis CNC machine. Technicians coat this foam with tooling paste, block sand it through progressive grits up to 2000, and polish it to a mirror finish.
Mold geometry requires careful engineering. All openings need structural tapers. Draft angles of one to three degrees prevent mechanical lock during demolding. Technicians close off these openings to the exact required depth. They must maintain minimum radius requirements across all edges. A "pencil round" edge, typically a 3mm radius, allows for clean demolding. Sharp 90-degree angles trap the cured part. Forcing a trapped part out causes micro-fracturing in the gel coat. These hairline cracks weaken the structure before the bumper even leaves the factory floor.
Manufacturers apply tooling gel coats to the finished plug. Tooling gel coat differs significantly from standard marine or automotive gel coat. It utilizes a vinyl ester base that offers superior hardness, heat resistance, and chemical resistance. Technicians spray this coating to a precise thickness of 18 to 20 mils. This ensures long-term mold surface integrity across hundreds of production cycles. A degraded mold transfers every pit, scratch, and imperfection directly onto the final product, forcing the end-user to perform extensive block sanding.
The application method directly dictates the structural integrity of the final product. Facilities generally choose between hand-laid fiberglass and chopper gun application. Evaluate these structural trade-offs when sourcing parts for any build.
Hand-laid manufacturing involves technicians manually placing woven roving and chopped strand mat (CSM) into the mold. They saturate the fiberglass mats with resin using specialized aluminum rollers or stiff brushes. They meticulously roll out trapped air bubbles to prevent voids. This method ensures consistent thickness across complex curves and sharp body lines. It provides a higher strength-to-weight ratio because the resin-to-glass ratio remains optimized, typically around 30% glass to 70% resin. Hand-laid parts fit better because the material distribution remains uniform. The structural integrity allows the bumper to withstand minor impacts and road debris without shattering.
Chopper gun manufacturing relies on a pneumatic gun system. The gun continuously cuts continuous fiberglass roving into short strands, mixes them with catalyzed resin mid-air, and sprays the mixture directly into the mold. This approach speeds up production significantly, allowing a single worker to lay up a bumper in minutes. However, it creates highly inconsistent resin pooling. The resulting bumpers are excessively heavy, brittle, and highly prone to warping during the cure cycle. Thick pools of resin generate excessive heat, pulling the part out of alignment before it even leaves the mold.
Manufacturing Metric | Hand-Laid Fiberglass | Chopper Gun Application |
|---|---|---|
Material Distribution | Highly consistent and controlled | Inconsistent with heavy pooling |
Strength-to-Weight Ratio | Excellent (lighter and stronger) | Poor (heavy and brittle) |
Warping Risk During Cure | Low | Extremely High |
Air Void Frequency | Minimal (rolled out manually) | High (trapped under thick spray) |
Production Speed | Slow and labor-intensive | Fast and automated |
Fiberglass production relies on precise chemical reactions. Polyester and vinyl ester resins transition from liquid to solid through cross-linking. Technicians trigger this process using a catalyst, typically Methyl Ethyl Ketone Peroxide (MEKP), mixed at a ratio of 1% to 2% by volume. This chemical phase generates significant heat. We call this an exothermic reaction. Ambient shop temperature heavily influences this process, with 77 degrees Fahrenheit considered the ideal baseline for predictable curing.
Managing this heat is critical for dimensional stability. Excessive heat generation occurs during a rushed layup process. If technicians apply too much resin at once, or if the ambient temperature is too high, the temperature spikes rapidly. This thermal spike leads to unpredictable shrinkage. The resin contracts aggressively as it cools. This contraction pulls the bumper out of factory tolerances. The mounting tabs shift inward, and the overall width of the bumper narrows. Skilled fabricators apply thin, controlled layers. They allow each layer to begin gelling before adding the next. This stages the heat generation and prevents aggressive contraction.
Patience during the curing phase separates premium manufacturers from mass-market producers. The mold acts as a rigid fixture holding the fiberglass in its intended shape. The part must remain in the mold until the chemical cure completes entirely. Technicians often use a Barcol impressor to test the hardness of the laminate before attempting removal.
"Green" demolding is a common manufacturing error in high-volume shops. Facilities remove the part before it achieves full chemical hardness to free up the mold for the next order. Parts that cure outside the rigid mold will warp. The internal stresses from the remaining chemical reaction twist the fiberglass. Accurate alignment with fenders and hoods becomes impossible. A bumper pulled too early will never fit correctly, regardless of the installer's skill level. Reputable shops leave complex aerodynamic parts in the mold for at least 24 to 48 hours, and some even post-cure the parts in heated booths to cross-link any remaining monomers.
Once fully cured, the bumper requires trimming. Manufacturers must remove the excess fiberglass from the mold edges. This excess material is the flange. It frames the perimeter of the part where it meets the vehicle body, headlights, and hood.
Trimming requires precision. Technicians use pneumatic cutoff wheels equipped with diamond-coated blades or 5-axis CNC routers to trim the perimeter. They must leave sufficient flange material. Installers need this extra material to work with during the final fitting phase. Cutting the edges exactly to the visible body line eliminates the installer's ability to shave or sand the bumper for a flush fit. A properly trimmed flange provides a buffer zone for custom bodywork, allowing the body shop to dial in the panel gaps perfectly.
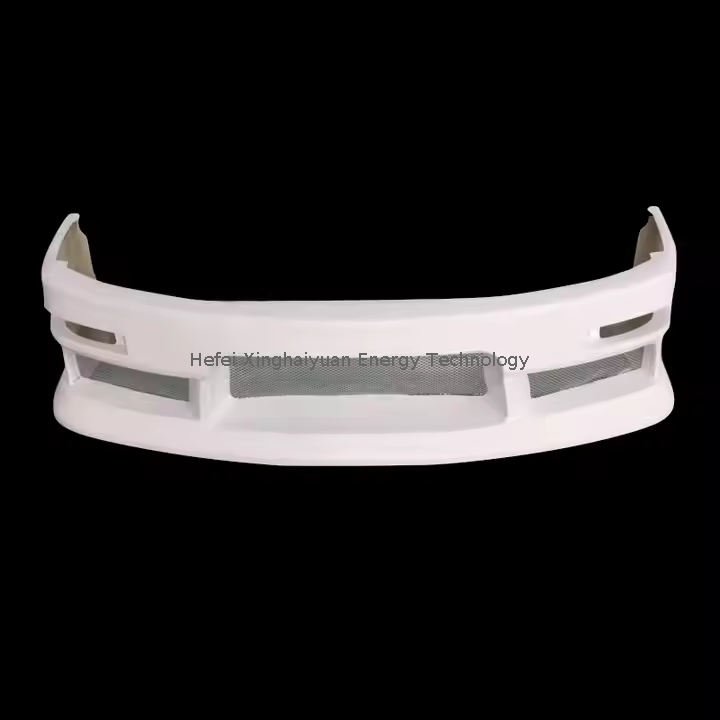
Buyers often blame the manufacturer for poor fitment. However, the vehicle receiving the bumper plays an equal role. Cars experience chassis flex over their lifespan. Minor collisions alter frame geometry, even if the damage appears entirely cosmetic. Factory tolerance shifts occur even on the assembly line, meaning two identical cars from the same year may have slightly different front-end dimensions.
A perfectly molded bumper may still fit poorly on an imperfect chassis. A ten-year-old vehicle will not have the exact same front-end dimensions it had when new. Sagging radiator supports, worn body mounts, and misaligned fender brackets compound the issue. Installers must account for these vehicle variances during every installation. They treat the aftermarket part as a blank canvas that requires tailoring to the specific car. You cannot expect a rigid composite part to conform to a twisted unibody without modification.
Many enthusiasts mistakenly treat fiberglass like polyurethane. Polyurethane flexes easily to close panel gaps. It conforms to the vehicle shape when bolted down. Fiberglass does not behave this way. It has a high modulus of elasticity, meaning it resists bending and retains its molded shape.
Attempting to force or bend fiberglass to close a gap creates immediate damage. The stress will result in spider-cracking the gel coat. Pushing further will snap the structural fibers entirely. You cannot stretch a short bumper to reach a fender. Applying heat lamps to soften the resin is a highly advanced technique that often results in blistering the gel coat if done incorrectly.
Minor tension adjustments are sometimes necessary. If slight flexing is absolutely required to align with fenders, you must distribute the tension evenly. Bend a little at each side simultaneously. Never force all the excess onto one side. This balanced approach minimizes the risk of structural failure. Use locking C-clamps or Cleco fasteners to hold the tension evenly while securing the mounting hardware.
Aftermarket aerodynamics often clash with factory hardware. OEM crash bars and impact absorbers represent the most common interference points. Factory bumpers use thin, flexible plastics to wrap around these safety structures. Fiberglass requires thicker profiles to maintain rigidity, which eats into the internal clearance.
Custom setups complicate clearance further. Engine swaps, front-mount intercoolers, and aftermarket oil coolers demand extra space behind the bumper cover. These modifications often necessitate cutting and re-glassing the bumper's inner structure. Installers must carve out sections of the fiberglass to clear the intercooler piping. They must seal these cuts with fresh resin to prevent moisture intrusion, which can cause the fiberglass layers to delaminate over time.
Modifying or removing impact bars introduces safety and compliance trade-offs. Removing a crash bar to fit an aggressive bumper design compromises frontal impact protection. Installers must fabricate custom tubular bash bars. These custom bars restore structural integrity while accommodating the new bumper shape. Never leave the front end unsupported just to fit a cosmetic part.
Professional installation begins with a comprehensive test fit. Installers mount the raw, unpainted bumper to the vehicle. They use temporary fasteners to hold it in place. They identify every interference point and panel gap before mixing any primer or paint. This follows the golden rule of bodywork: fit before paint.
They rough up interference points using heavy-grit abrasives. Body shops typically use 36-grit to 80-grit sandpaper on a dual-action sander. This shaves down high spots where the bumper contacts the headlights, hood, or fenders. Shaving must be done gradually. Technicians sand a few millimeters, remount the bumper, and check the clearance. Removing too much material compromises the structural integrity of the mounting flange. Precision sanding blocks ensure flat, even gaps across long body lines.
Sometimes the bumper falls short of the fender line. Shaving cannot fix a gap that is too wide. Installers must build up the edge to meet the vehicle body.
The mitigation strategy requires precision and patience. Technicians apply multiple layers of 3M automotive masking tape to the vehicle body to protect the paint. They apply a chemical release agent over the tape. They bolt the bumper firmly into place. Next, they build up the bumper edge with 1.5 oz chopped strand mat and catalyzed resin. The wet fiberglass cures directly against the taped fender, matching its exact contour. Once cured, they remove the bumper. They trim the excess hardened fiberglass with a cutoff wheel. Finally, they smooth the transition with a skim coat of premium body filler. This creates a seamless, factory-style panel gap.
Factory bumpers use flexible plastic tabs that snap into brackets. Fiberglass bumpers require hard mounting points. Installers must drill custom mounting holes through the flanges to secure the part to the chassis.
Raw fiberglass holes wear out quickly under vehicle vibration. The edges fray, and the holes elongate. This causes the bumper to sag over time. Installers reinforce these points to prevent vibration-induced cracking. They bond aluminum backing plates or metal fender washers into the fiberglass behind the drilled holes using structural panel bond adhesive. Alternatively, they add extra layers of woven roving fiberglass around the mounting flanges before drilling. Distributing the clamping force of the bolt across a wider area prevents the fiberglass from crushing under torque.
Selecting the right manufacturer dictates the success of your project. You must assess their production standards before ordering. Ask manufacturers specific technical questions about their facility.
Request details about their resin systems. Vinyl ester resins shrink less and offer higher heat distortion temperatures than standard ortho-polyester resins.
Inquire about their layup methods. Confirm they use hand-laid techniques rather than automated chopper guns.
Ask for their in-mold curing times. Reputable facilities leave parts in the mold for at least 24 hours to ensure dimensional stability.
Verify their flange trimming standards. Ensure they leave adequate material for custom fitting and shaving.
Check their shipping and storage practices. Bumpers stored standing on their ends will warp under their own weight over time.
The surface finish of the bumper reveals the condition of the mold. Poor mold maintenance shows up immediately upon unboxing. Look for pitting, dull spots, alligatoring, or the transfer of mold defects to the bumper. Fixing these issues requires extensive high-build primer and block sanding. Wavy reflections in the gel coat indicate a warped mold or uneven resin distribution. Print-through, where the fiberglass weave texture is visible through the gel coat, indicates the resin cured too hot or the gel coat was applied too thin.
Proper manufacturer mold repair processes prevent these defects. Reputable makers actively maintain their tooling. When a mold chips, they dig out the defects with sharp tools. They re-apply tooling gel coat, sand it flush, and polish it to a mirror shine. This ensures a flawless surface finish on the final product. A clean gel coat drastically reduces prep time for the painter, streamlining the entire installation process.
Precision manufacturing requires time and skilled labor. High-quality molds, hand-laid materials, and proper curing cycles demand a larger upfront investment from the manufacturer. This translates to a superior physical product.
Consider the labor trade-off during installation. A poorly molded bumper requires dozens of hours of specialized body shop labor to correct. Installers must cut, extend, shave, and re-glass warped components just to make them mountable. A precision-molded bumper from a reputable manufacturer requires minimal shaving and gap matching. Investing in accurate manufacturing saves significant labor hours during installation. The effort required to prepare the vehicle drops exponentially when the baseline part is dimensionally stable. You trade initial research and careful sourcing for a smoother, faster installation process.
Consult with a specialized composite body shop to secure an accurate estimate for test-fitting, shaving, and gap-matching before ordering parts.
Request written confirmation from the manufacturer regarding their in-mold curing times and hand-laid production methods.
Purchase heavy-grit abrasives, structural adhesives, and fiberglass matting in advance to prepare for necessary flange modifications.
Schedule a pre-installation teardown to identify any bent crash bars or sagging radiator supports that require correction.
A: No, you cannot bend fiberglass like polyurethane. Attempting to force or bend it will cause the gel coat to spider-crack or snap the internal structural fibers. If minor tension adjustments are necessary, distribute the pressure evenly across both sides rather than forcing all the excess onto one corner.
A: Every installation requires some bodywork. You should expect to perform initial test fitting, shave down high spots around the headlights and fenders, and drill custom mounting holes. Poorly manufactured parts may also require cutting, extending edges with fiberglass mat, and extensive block sanding to correct warped surfaces.
A: An OEM fiberglass bumper is manufactured under strict factory quality controls, ensuring exact dimensional tolerances and consistent material thickness. Aftermarket versions vary wildly in quality. They often use different resin mixtures, rushed curing times, and cheaper layup methods, which can lead to shrinkage and fitment issues.
A: You fix wide panel gaps by building up the bumper edge. Apply masking tape and a release agent to the vehicle fender. Bolt the bumper in place, then apply fiberglass mat and resin to the bumper edge until it meets the taped fender. Sand smooth once cured.
A: Often, it will not fit directly. Aftermarket designs usually feature different profiles than factory bumpers. You may need to trim the inner fiberglass structure to clear intercooler piping. In some cases, factory impact bars must be replaced with custom tubular bash bars to accommodate aggressive bumper designs.
A: Cracking occurs when installers try to stretch the bumper over the chassis or tighten mounting bolts without proper reinforcement. Forcing misaligned holes creates stress points. Drilling holes without adding metal washers or extra fiberglass layers also leads to vibration-induced cracking over time.
A: Body shops typically use heavy-grit abrasives for initial shaving. Use 36-grit to 80-grit sandpaper on a dual-action sander to quickly remove material from high spots. Once the basic fitment is achieved, switch to finer grits to smooth the edges before applying primer and paint.


 info@xhyfrp.com.cn
 86-15801078718
 Plant No.4, Area E, Nanju Industrial Park,Hangbu Town, Shucheng County, Anhui, China


